MechLink Logo
Ana Sayfa  > Haberler  > Hydraulic pump repair: step-by-step guide

Hydraulic pump repair: step-by-step guide

2026-07-11

FacebookLinkedinTwitterWhatsapp

When a hydraulic pump starts acting up, the job slows down fast: weak lift, slow travel, jerky functions, and heat that keeps climbing. In this guide, we’ll walk through a practical hydraulic pump repair process for off-road machinery—how to identify the pump type, why pumps fail, how to troubleshoot in the right order, and how to choose replacement parts so the fix lasts instead of coming back next week.

What Are the Different Types of Hydraulic Pumps?

Before you turn wrenches, we need to know what we’re working on. Pump design affects typical failure points, test methods, and whether a rebuild is worth it.

1) Gear pumps

Where you see them: smaller loaders, tractors, utility machines, simple implement circuits, steering/aux hydraulics.
Why they’re used: simple, durable, and cost-effective.
Common wear pattern: housing and gear tips wear over time, increasing internal leakage. Once the housing is worn, a full rebuild may not restore performance.

Typical symptoms

  • slow functions at normal RPM
  • worse performance as oil warms up (leakage increases with heat)
  • whine from aeration or inlet restriction

2) Vane pumps

Where you see them: many mobile hydraulic systems that need smooth flow and medium pressure.
Why they’re used: smooth output and good efficiency for the cost.
Common wear pattern: vane cartridge wear, scoring on cam ring/plates, and seal issues. Cartridge replacement often restores performance if the housing isn’t damaged.

3) Piston pumps

Where you see them: high-demand circuits on loaders, excavators, and hydrostatic systems that need high pressure and control.
Why they’re used: high efficiency and strong pressure capability.
Common wear patterns: swash plate/valve plate scoring, piston shoe wear, bearing issues, case drain increase, control/servo problems.

Why Do Hydraulic Pumps Fail?

Most pump failures come from a short list of root causes. Knowing them helps us troubleshoot faster and avoid replacing the wrong part.

Contamination

Contamination accelerates wear on tight-clearance parts. It also damages control valves and relief valves, which can mimic pump failure.

What it looks like

  • scored parts during teardown
  • filter bypass or frequent plugging
  • sticky valves, inconsistent pressure

Prevention that actually works

  • correct filter rating and change interval
  • clean refill practices (clean funnels, sealed containers)
  • suction strainer checks (if equipped)

Cavitation and aeration

Cavitation happens when the pump can’t get enough oil at the inlet (restriction, low oil level, wrong viscosity, cold oil). Bubbles collapse under pressure and pit metal surfaces. Aeration (air leaks into the suction) causes spongy operation and heat.

What it looks/sounds like

  • rattling/knocking or “gravel” sound near the pump
  • foamy oil in the tank
  • rapid temperature rise

Excessive heat

Heat thins oil, reduces lubrication, and hardens seals. Above normal ranges, wear speeds up and internal leakage climbs.

Common causes

  • running over relief too often
  • blocked coolers/poor airflow
  • internal leakage in cylinders, valves, hydraulic motor circuits, or the pump itself
  • Wrong oil viscosity for temperature

If you want a fast refresher on what failure looks like in the real world (noise, cavitation, overheating, contamination patterns), this breakdown of pump failure warning signs and maintenance actions is a useful companion reference: pump failure warning signs and maintenance actions.
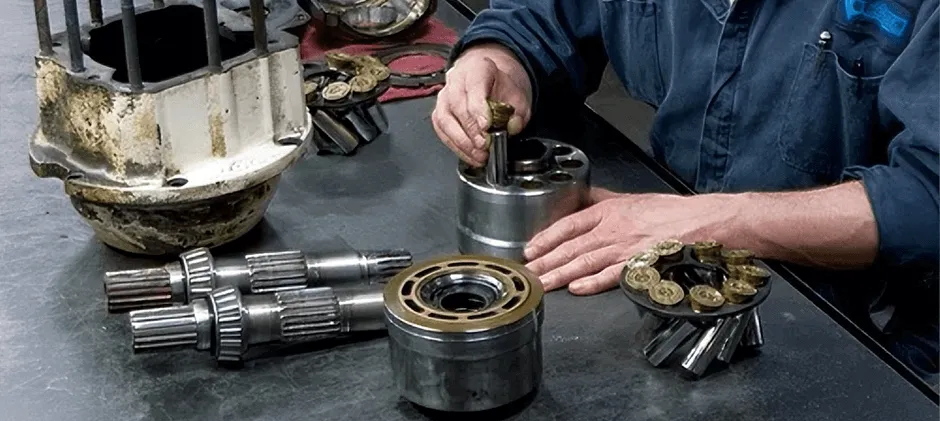
Step-by-Step Hydraulic Pump Troubleshooting Guide

Step-by-Step Hydraulic Pump Troubleshooting Guide

This is the core of hydraulic pump repair: a structured sequence that prevents guesswork. We’ll start simple and only move toward teardown when test results point there.

Step 1 — Safety and setup

  • Park on stable ground, lower attachments, shut down.
  • Lockout/tagout the power source where applicable.
  • Relieve hydraulic pressure (follow the machine procedure).
  • Use PPE and keep a clean work area—hydraulics hate dirt.

Step 2 — Confirm the symptom and isolate the circuit

Write down what’s wrong and when it happens:

  • only at idle vs also at high RPM, only when oil is hot, only one function (boom) vs all functions, noise location: pump, suction line, valve bank, hydraulic motor area

Quick isolation questions

  • If steering is weak but implements are OK, the issue may be a separate pump section or priority valve.
  • If travel is weak on a machine with drive motors, the pump may be fine, and the Hydraulic motor (drive motor) may be leaking internally.

Step 3 — Check fluid level, condition, and correct oil

This is the fastest “save a pump” check.

  • Verify level at the correct condition (engine off / cylinders positioned per manual).
  • Look for milkiness (water), dark/burnt smell (heat), and foam (air).
  • Confirm the viscosity grade is appropriate for the ambient temperature.

If oil is foamy, suspect suction leaks or a low fluid level. Fix that before touching the pump.

Step 4 — Inspect for external leaks and suction-side issues

Most cavitation starts on the inlet side.

  • Inspect the suction hose for cracks, soft spots, and loose clamps.
  • Check suction strainer condition (if the machine has one).
  • Check for collapsed hose liners and sharp bends.
  • Ensure the reservoir breather isn’t plugged (can contribute to flow issues).

Rule: pressure-side leaks make a mess; suction-side leaks often pull air without leaking oil.

Step 5 — Check filters and restriction indicators

A clogged filter can starve the flow or force bypass (sending dirt through the system).

  • Replace filters if the interval is close or contamination is suspected.
  • If you find metal in the filter, stop and investigate—don’t “just change the pump.”

Step 6 — Basic pressure test

Use the correct test ports and gauges rated for the system.

  • Check standby/charge pressure (where applicable).
  • Check the main relief pressure under controlled load.
  • Compare readings to spec.

Interpretation

  • Low pressure everywhere can be a relief valve stuck open, pump wear, or a severe suction issue.
  • Normal pressure but slow function points to low flow (pump wear, inlet restriction) or excessive leakage downstream.
  • Pressure spikes + heat often mean operating over relief, a stuck valve, or a blocked return/cooler.

Step 7 — Flow test (if available) and case drain checks

A flow meter (or shop flow test) is the cleanest way to confirm pump output. For piston pumps, case drain flow is a strong indicator of internal wear.

  • High case drain + weak performance usually means internal leakage in the pump rotating group.
  • If case drain is normal but performance is poor, look harder at valves, actuators, and hydraulic motor leakage.

Step 8 — Rule out actuator and valve leakage before condemning the pump

A worn cylinder seal or a valve spool leaking internally can steal flow and build heat.

  • Cylinder drift tests and temperature comparisons across valve sections can help.
  • On machines with travel circuits, a worn drive Hydraulic motor can dump flow to the case and mimic pump failure.

Step 9 — Decide: reseal, rebuild, or replace

At this point, you should have evidence, not guesses.

Reseal makes sense when

  • Pump performs normally but leaks externally (shaft seal, O-rings)
  • No signs of contamination damage internally

Rebuild makes sense when

  • Wear parts are available, and housing/major surfaces are serviceable
  • Tests show internal leakage, but the pump is a good rebuild candidate (often vane and piston pumps)

Replace makes sense when

  • The gear pump housing is worn/scored badly
  • The rotating group or hard parts are damaged beyond practical repair
  • Contamination damage is widespread, and time matters more than bench work

Top Tips for Successful Hydraulic Pump Repair

These are the details that separate a lasting fix from a repeat failure.

  1. Fix the root cause first (air, restriction, heat, contamination).
    Replacing a pump without fixing suction leaks or a blocked cooler is a fast way to ruin the new unit.
  2. Keep everything clean during disassembly and assembly.
    Cap lines, plug ports, and use lint-free wipes. One dirty rag can undo the whole job.
  3. Replace seals as a set, not one-by-one.
    Mixing old and new seals often creates new leaks.
  4. Use correct torque and assembly order.
    Over-torquing can warp plates; under-torquing can cause internal leakage.
  5. Prime the pump if the design requires it.
    Dry starts can score surfaces in seconds. Follow the machine procedure.
  6. After repair, monitor the temperature and noise under a controlled test.
    The first hour of operation tells the truth: watch for foaming, heat rise, and unstable pressure.

Fast “symptom → cause → action” table

Symptom Most likely causes What you do first
Whining/knocking at the pump Cavitation, suction restriction, air leak Check fluid level, suction line, breather, and strainer
Slow functions, worse when hot Internal leakage (pump or actuators), oil too thin Pressure + flow test; compare temps across components
Foamy oil Suction leak, low level, return leak above oil line Fix suction connections; correct level; check return routing
Runs hot fast Over-relief operation, internal leakage, blocked cooler Check relief settings, cooler airflow, and leakage tests
Normal pressure but weak travel Drive hydraulic motor leakage, valve issue Case drain check on motor; valve diagnostics

Conclusion

Good hydraulic pump repair starts with disciplined troubleshooting: verify fluid and suction health, confirm pressure and flow, then isolate whether the pump, valves, actuators, or a hydraulic motor is causing the loss. When it’s time to replace a full pump or rebuild with kits, MechLink supports off-road machinery owners with high-quality aftermarket options at affordable prices, a vast inventory, and wide compatibility across many heavy equipment brands—helping us cut downtime and get back to work faster.
SON ÇIKTI

Mechlink:10 essential tips for protecting hydraulic pumps and hoses
Product knowledge

10 essential tips for protecting hydraulic pumps and hoses

2026-07-11

Mechlink:Master warning light: what it means and what to do
Product knowledge

Master warning light: what it means and what to do

2026-07-10

Mechlink:Fuel level sensor "a" circuit high: meaning and fixes
Product knowledge

Fuel level sensor "a" circuit high: meaning and fixes

2026-07-10

Mechlink:Which oil is best for your tractor diesel engines?
Product knowledge

Which oil is best for your tractor diesel engines?

2026-07-09