2026-08-13
When a Cummins-powered off-road machine throws SPN 6713 FMI 9, we usually have two immediate goals: get the engine back to stable power and prevent a repeat shutdown or derate during a job. This article explains what the code points to, why it shows up in real off-road conditions (heat, vibration, dust), and a practical troubleshooting path you can follow before you start swapping parts.
On many Cummins engine applications, SPN 6713 is associated with a fault in the turbocharger compressor outlet temperature sensor circuit. In plain terms, this sensor is used to monitor the temperature of the compressed air coming out of the turbocharger compressor (often in the charge-air piping area). The engine controller uses that temperature input to help manage performance and emissions-related strategies.
FMI (Failure Mode Identifier) describes the type of failure seen for that SPN. Under SAE J1939 conventions, FMI 9 commonly indicates an abnormal update rate—the controller is not receiving a valid, properly updating signal at the expected frequency.
Depending on calibration and machine strategy, this fault may show up with:
In off-road environments, the sensor itself fails sometimes, but connectors and harness routing are just as common. Here are the most typical causes you see in the field.
The turbo compressor outlet temperature sensor can fail electrically (intermittent output, internal open/short, heat damage). Failures are more likely when the sensor sits in a high-heat zone near the turbo outlet.
Off-road machines vibrate and flex harnesses constantly. Common harness problems include:
Even “sealed” connectors can develop:
Oil mist, dust, and debris can collect around charge-air components. While contamination alone doesn’t always cause an FMI 9, it often comes together with connector and harness issues in the same area.
A failing ECM, incorrect calibration, or a module communication problem can also lead to abnormal update rate faults—but you treat these as later-stage suspects after wiring and sensor checks.
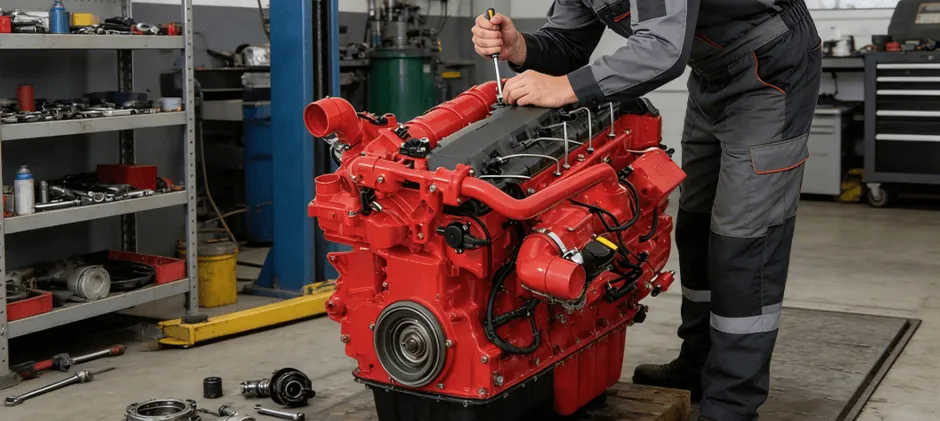
You get better results when you troubleshoot in a tight sequence. The goal is to confirm whether the problem is signal dropout, power/ground, connector integrity, or sensor failure—before replacing anything.
Before you clear the fault, record:
If your scan tool supports it, capture a snapshot/trend of the temperature signal.
Locate the compressor outlet temperature sensor (location varies by engine and machine packaging; it’s commonly on or near the charge-air piping close to the turbo outlet).
Check these items carefully:
If you find obvious harness damage, fix it first—it’s a top cause of FMI 9.
With the engine idling (and following your site safety rules), gently wiggle:
Watch for:
If the reading drops out when you move the harness, you’ve likely found a connection/harness fault.
Unplug the connector and inspect:
Clean and dry as appropriate, then ensure the connector has solid retention and proper sealing. Replace damaged terminals/housings rather than “making it work.”
Use the correct wiring diagram for your engine/machine. Then verify:
Because Cummins applications differ by engine family and machine OEM integration, you avoid guessing pinouts and values, use the service manual for your exact engine serial number and harness.
If wiring and connectors check out, suspect the sensor.
A practical approach is:
If the signal is unstable and the circuit is good, replacing the sensor is justified.
After repairs:
| What you see | Most likely causes | What you do first |
| Code appears only under heavy load/vibration | Harness rub, loose pins, heat-softened insulation | Wiggle test + inspect harness tie points |
| Code appears after pressure washing/rain | Water intrusion, corrosion in the connector | Open connector, dry/clean, check seals |
| Temperature reading drops to blank/0/implausible | Intermittent signal or sensor failure | Check pin tension + continuity, then the sensor |
| Code returns immediately after clearing | Hard fault: open/short, unplugged sensor | Visual check, then circuit checks |
| No visible issues, but repeating | Internal wire break, sensor electronics, rare ECM issue | Voltage drop + continuity checks, then sensor swap |
If your testing points to a failed sensor, damaged connector housing, or a heat-damaged harness section, replacing the correct component is usually faster and more reliable than repeated repairs. For fleets that run Cummins engines across excavators, loaders, dozers, compactors, and similar equipment, keeping sources organized helps reduce downtime.
When you’re ready to source replacements, you can browse Cummins parts by engine model and common components. MechLink positions these as aftermarket options with high standards and a 1-year warranty, which can be useful when you need a dependable part at a controlled cost.
Prevention for SPN 6713 FMI 9 is mostly about protecting signal quality in harsh conditions. Here’s what tends to work well for off-road machines.
FMI 9 faults often start as occasional dropouts. If you treat the first event as noise, it commonly becomes a job-stopper later—usually at the worst time (night shift, rain, or a peak production day).
SPN 6713 FMI 9 usually indicates an abnormal, unstable signal update related to the turbocharger compressor outlet temperature sensor circuit. On off-road machinery, the most common root causes are harness damage, connector pin issues, and heat/vibration effects near the turbo area. A clean diagnostic sequence—record conditions, inspect, wiggle test, verify wiring, then replace the confirmed failed part—solves the issue faster and helps prevent repeat faults during heavy work cycles.