MechLink Logo
рд╣реЛрдо┬а >┬ард╕рдорд╛рдЪрд╛рд░┬а >┬аHow to replace a windshield wiper motor?

How to replace a windshield wiper motor?

2026-08-11

FacebookLinkedinTwitterWhatsapp

When an off-road machine loses wiper power, the problem isnтАЩt comfortтАФitтАЩs safety and uptime. Mud, dust, rain, and snow can quickly turn a windshield into a blind spot. In this guide, weтАЩll explain what a windshield wiper motor does, how to confirm itтАЩs the real failure (not a fuse, switch, or jammed linkage), and how we typically replace it on cabbed equipment in a clean, repeatable way.

What Does a Windshield Wiper Motor Do?

A windshield wiper motor is an electric motor that converts electrical power into the motion that sweeps your wiper arms across the glass. On most off-road machines (loaders, excavators, backhoe loaders, tractors, and similar cabbed equipment), the motor drives a linkage/transmission that turns one or more pivot shafts. Those pivots move the wiper arms in a fixed arc and return them to a designed тАЬparkтАЭ position.

Why Wiper Systems Matter More in Off-Road Machinery?

Off-road environments punish wiper systems. Vibration, temperature swings, dust, and water exposure raise the load on the motor and the linkage. ThatтАЩs why the first symptoms often show up under stressтАФheavy rain, a dry windshield with gritty dust, or frozen wiper blades.

Common signs that the motor (or system) is failing

  • From field experience, you usually see these patterns:
  • Sluggish or inconsistent wiping
  • No sound/no movement when the switch is turned on
  • Wipers stop mid-sweep or park incorrectly
  • Grinding/clicking (often linkage bind or worn gear inside the motor)

Quick Diagnostics to Avoid Unneeded Parts

Because replacement steps take time (and sometimes cab trim removal), you usually run a short check first. Many тАЬbad motorтАЭ reports turn out to be power supply issues or mechanical binding.

1) Confirm the complaint and conditions

  • Do the wipers fail on all speeds (if equipped) or only one?
  • Does it fail only when the windshield is dry/dusty (high friction)?
  • Does it fail after the machine warms up (heat-related electrical issue)?

2) Check the simplest electrical items

  • Fuse: Look for a blown fuse and signs of repeated failure.
  • Relay (if used): Swap with an identical relay for a quick check.
  • Switch: Loose switch contacts can mimic a motor issue.
  • Connector at the motor: corrosion, water intrusion, loose pins.

3) Check for mechanical binding (very common off-road)

  • Lift the wiper arms slightly (if safe) and feel for abnormal resistance.
  • Inspect the pivot area for packed dirt, ice, or bent arms.
  • If accessible, disconnect the linkage from the motor and see if:
  1. The motor spins freely (electrical side ok)
  2. The linkage moves freely by hand (mechanical side ok)

Fast reference table: symptom тЖТ likely cause тЖТ check

Symptom Likely cause (most common first) What you check first
No movement, no sound Fuse/relay/power feed issue Fuse, relay, voltage at motor connector
No movement, motor hums Linkage jam or seized pivots Linkage, pivots, wiper arm binding
Slow wiping High friction, weak motor, low voltage Arm/blade drag, pivot stiffness, battery/charging voltage
Stops mid-cycle / wrong park Park circuit issue, internal motor fault, loose linkage timing Motor тАЬparkтАЭ function, linkage alignment, and connector condition
Clicking/grinding Stripped gear or binding linkage Linkage-free play, gear noise location

If these checks point to the motor itself (or the motorтАЩs internal park mechanism), replacement is usually the most reliable fix.
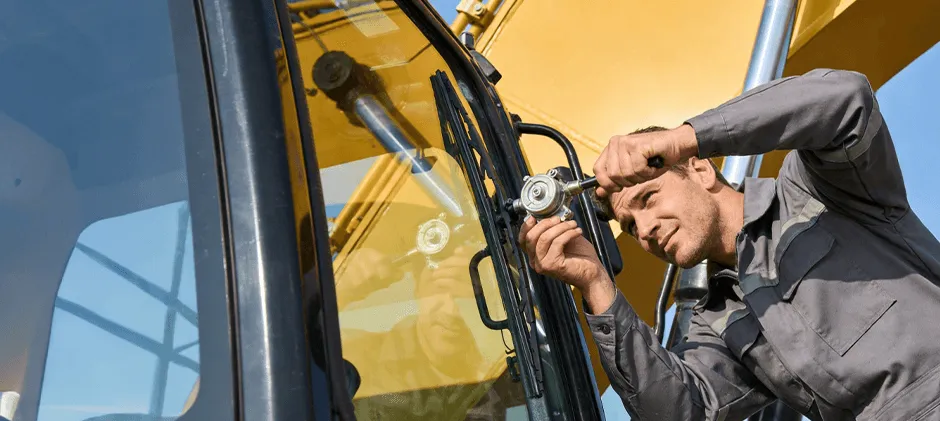
Step-by-step replacement procedure

Step-by-step replacement procedure

Step 1: Put the wipers in the parked position

If the system still works intermittently, cycle it and turn it off so it parks normally. This makes reassembly easier and helps prevent wrong sweep angles.

Step 2: Remove the wiper arms (if they block access)

Many machines require arm removal to lift a cowl or access a pivot plate.

  • Flip up the cap (if present)
  • Remove the retaining nut
  • Mark the arm position on the glass with tape (helps realignment)
  • Pull the arm off the splined shaft (a puller may be needed if stuck)

Tip: DonтАЩt pry hard against the windshield or painted panels. Use the right puller if itтАЩs seized.

Step 3: Remove the cowl/cover/trim to access the motor

Remove screws, bolts, and plastic fasteners and lift off the panel. Keep fasteners grouped by location.

This is where off-road equipment differs: access panels can be thicker and may include seals for dust and water. Inspect and save those seals if theyтАЩre still good.

Step 4: Disconnect the motor electrical connector

  • Unclip the harness from any retainers
  • Inspect for corrosion or moisture
  • Clean contacts if needed

If the connector is heat-damaged or loose, fix that tooтАФotherwise a new motor can still act тАЬbad.тАЭ

Step 5: Disconnect the linkage from the motor output

Depending on the design, you may see:

  • a single nut/bolt at the crank arm
  • a ball-joint style linkage connection
  • a small gearbox interface

Support the linkage so it doesnтАЩt drop and bend.

Step 6: Unbolt and remove the motor assembly

Most motors mount with three (or more) bolts. Remove them, then lift the motor out carefully without stressing the harness.

Step 7: Prepare and тАЬparkтАЭ the new motor before final linkage hookup

This step prevents the wrong park position and odd wipe direction.

  • Install the new motor loosely or hold it safely
  • Plug the connector in
  • Reconnect the power temporarily and cycle the motor once so it stops in its park position
  • Disconnect the power again

Now the motor is тАЬparkedтАЭ and ready to match the linkage timing.

Step 8: Install the New Motor, Linkage, and Reassemble Components

  • Bolt the motor into place and tighten evenly.
  • Attach the linkage in the correct orientation and ensure it moves freely through its full arc without binding.
  • Reinstall the cowl trim, cover panels, and seals.
  • Fit the wiper arms back onto the splines in the correct parked position and tighten the retaining nuts to the specified torque (refer to your service manual).

Step 9: Functional Test and Final Inspection

  • Reconnect power and test all wiper functions:
  • Low/high speeds (if equipped)
  • Wash function (if equipped)
  • Proper park position
  • Confirm smooth, quiet operation with no binding, noise, or irregular sweep.

Choosing the Correct Replacement Motor

On off-road machinery, the тАЬclose enoughтАЭ part often becomes a repeat failure because fitment is more than bolt holes.

You make sure the replacement matches:

  • Mounting pattern and bracket shape
  • Electrical connector style and pin layout
  • Motor torque and speed
  • Park function orientation
  • Sweep geometry (how the linkage is driven)

If you want a straightforward way to browse options that are meant to meet standard expectations for torque, speed, and mounting precision, MechLink lists dedicated windshield wiper motor replacements and notes that their motors are engineered to ensure compatibility and are application-tested for direct fitment.

Common Replacement Mistakes

1. Skipping the тАЬparkтАЭ alignment step

Result: wipers park too high, hit a window seal, or sweep the wrong area.

2. Ignoring linkage drag

A new motor can still blow a fuse if the pivots are packed with grit or partially seized.

3. Overtightening arm nuts

This can damage splines or make future service painful.

4. Leaving the harness unsecured

Vibration can chafe wiring fast on heavy equipment.

Conclusion

Replacing a windshield wiper motor on off-road machinery is usually straightforward once we confirm the fault isnтАЩt a fuse, switch, or binding linkage. The key steps are safe power isolation, clean access, correct linkage timing, and making sure the new motor is parked before final assembly. With proper fitment and a quick post-install test, we restore clear visibility and reduce the chance of repeat downtime in rain, snow, or heavy dust.
рдирд╡реАрдирддрдо рд░рд┐рд▓реАрдЬрд╝

Mechlink:Case serial number lookup: 1 minute to find your pin
Product knowledge

Case serial number lookup: 1 minute to find your pin

2026-08-11

Mechlink:Top 10 causes of low oil pressure in an engine
Product knowledge

Top 10 causes of low oil pressure in an engine

2026-08-11

Mechlink:Does def expire? dealing with def issues
Product knowledge

Does def expire? dealing with def issues

2026-08-11

Mechlink:How long can you leave a block heater plugged in?
Product knowledge

How long can you leave a block heater plugged in?

2026-08-10